|
|
 |
[Editor's
Note: The Shotgun Blimp is designed to fit
Tyler's shotgun shock mount, which can be found at wiremonkey.com.
Additionally, we will be reprinting his shockmount plans,
as well as the plans for his boom pole, in our July issue.]
Building
the shotgun blimp for my audio rig was probably the most
difficult part because of all the fitting and sewing and
spraying glue, etc.
As
you can see it doesn't look so bad for a DIY blimp. It is
constructed of 1/4" open cell foam that I got from a local
mattress foam joint, black plastic hardware cloth (screen),
zip ties, thick thread, elastic and some hooks.
First
you have to cut a rectangular piece that is slightly larger
than what it takes to wrap around the shock mount. I didn't
take measurements and ended up trimming here and there
to get what I wanted anyway. Lay the hardware cloth down
on newspaper and spray it with a decent coating of foam
contact cement. Remove it from the newspaper quickly so
you don't get the paper stuck to it. 3M makes a good contact
cement. Let it sit for a bit to get tacky and then lay
your precut, slightly larger piece of foam on it and push
to make sure it makes good contact everywhere. (This step
is not shown)
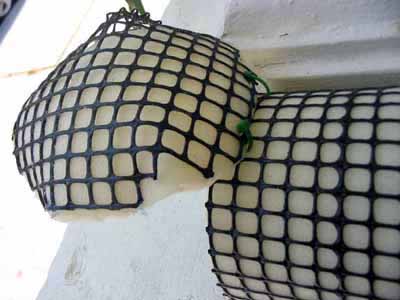
Then
cut a round piece a bit larger than the front of the cylinder.
You can always trim it down. I actually curved the front
slightly by setting the oven to 200 degree and placing
a round bowl in the center of the hardware cloth. When
it got hot enough it bent slightly. Not sure if I would
do that again. It's fine to have a flat front and rear
and probably looks better. I sewed the front round disk
on with thick black thread and that worked amazingly well.
If you look below, you can see a notch cut out for the
microphone holder. Once the front is sewn up with zip
ties and thread, you can slip the shock mount in.
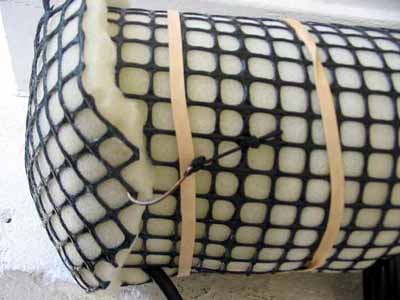
If
you look at the front of the bottom seam here, you can see
one of the small zip ties I used to connect it. You can
also see the hooks that are used to hold the rear foam panel
on. It is hinged at the top with a couple of zip ties.
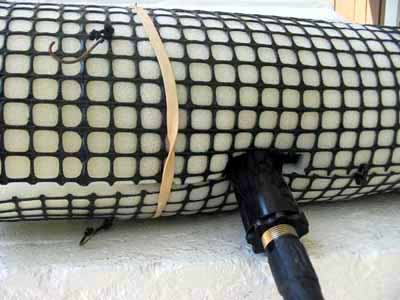
I
use rubber band to hold the rear seem together. This works
well because you have to be able to remove it. Use two.
You can also see the hooks here. I used fishing hooks that
I cut the barbs off of and tied them to elastic cord.
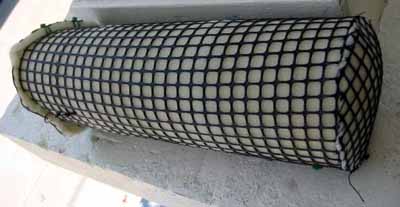
Here
is the rear cover. You can see this one is bent as well
using the oven, but had I to do it again I would keep it
flat. The two green zip ties act like a hinge so you can
easily remove the cover to get at the mic. and cable, etc.
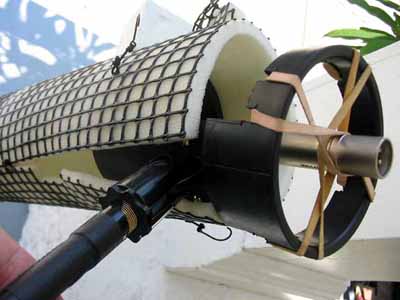
Here's
what it looks like with the rear cover on, the second elastic
holding the seam tight and the mic cord coming out. See
how the hook holds it secure and makes a pretty good air
tight seal.
|
|
|
|