Orion DVC210 Crane
 Manufacturer: ProAm USA
Website: http://www.proamusa.com
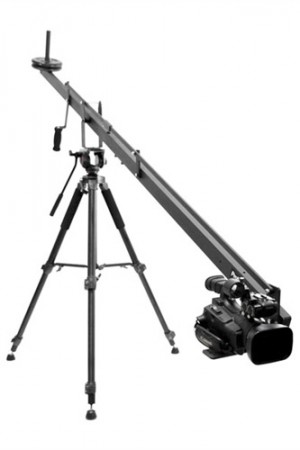
Description: 8′ Jib Arm for cameras up to 10 pounds
Purchase/Rent: Both.
Pricing: $299 for overslung (10 pound); $279 for sidemount (8 pound)
Recommended Accessories: Crane Stand & Mount – $54.99; Crane bag – $59
Discount: Click Here
Expected Release: Available Now
Review Issue: Issue #99 (06/14)
Reviewed By: Jeremy Hanke
Final Score: 9.4
When it comes to achieving cinematic intros and exits to scenes—or often, entire films—nothing beats a good crane shot. The downside with crane shots is that they’re usually expensive, due to the rental cost of the equipment, the expertise required to run them effectively, and the time to set them up and tear them down.
Let’s not forget that the way these shots got their names was that they were originally accomplished with actual cranes. The creation of the counterweight-balanced, lever-based jib arm began the transition from ultra expensive equipment for old Hollywood films into the more economical range that’s allowed Indie filmmakers to use them.
 Because the technology is pretty rudimentary (essentially going back to Archimedes), a lot of filmmakers have attempted to build these themselves. With enough time and materials, you can successfully craft one without paying a company to do it—however, the amount of time and materials to successfully pull this off quickly escalates. In fact, about five years ago, we had a DIY filmmaker attempt to craft a cheap crane for us as a proof of concept. He was positive it could be done just as well as professional $1K-$2K cranes for less than $100 bucks and less than 20 hours of labor. I’m pretty sure it was over $350 and probably 50 hours of work by the time it was all said and done. While it did work pretty well, it had some special quirks and it definitely looked DIY. Not something you’d likely want to use on a client based shoot.
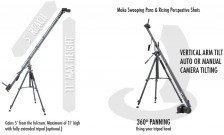
ProAm USA, however, has been working to make reliable cranes that are so cost-effective you couldn’t even dream of trying to make them yourself for what they charge. And, quite frankly, they’ve been doing a pretty great job with this strategy. In today’s review, we look at the Orion 210, which is an 8′ crane (as far as actual length goes) but can potentially move a 10 pound camera over a range of 10′, so long as you have a 5′ or taller tripod.
Ease of Use
Ease of assembly on the Orion 210 is pretty impressive. They include a simple color photobooklet to show you how to assemble the four pieces of the main crane. Five pieces, if you’re using a longer form video camera, like a Canon XL form factor, since it includes a special extension plate. [Note: The extension plate only comes with the Overslung version which we reviewed, which is rated for 10 pounds. The underslung version is only rated for 8 pounds and seems less suitable for anything over DSLR size.]
Once I got everything out of the box, it took me about 20 minutes to assemble this the first time. After that, between 10-15. (That was by myself. Much less time if you have an assistant.)
Now, it is important to clarify for folks new to this type of gear that the Orion 210 is a jib arm, as opposed to a crane with an included tripod. (The terms “crane” and “jib” tend to be used interchangeably in regards to the equipment, because these two filmmaking terms are used interchangeably for the shots they create, such as “Crane Up” or “Jib Down”.) As such, you will need to have a pretty rugged video rated tripod with a long plate to serve as a base for this system, since you could easily end up with more than 50 pounds on it. (The jib hardware is about 20 pounds itself, and, if you’re using a five pound rigged out camera, you’ll need about 15 pounds of counter balance weights, which puts you at about forty pounds. If its a max weight camera setup at 10 pounds, you’ll need 30 pounds of counterweights, which puts you at 60 pounds, to say nothing of any monitors or other things you may put at the fulcrum.) Even if you have a tripod that fits those needs, ProAm sells a Crane Stand & Mount as an optional accessory for less than $60—and I highly recommend that.
The other thing for newcomers to realize is that you will need to purchase your own counterweights. They don’t provide them for you (even as accessories), although they have very nice secure barbell holders so you can use weights you buy at your local sporting goods stores. (Depending on your local pricing, you’ll probably drop $20-$40 in weights if you have to buy them new.)
With that said, you could also go the sand bag route, so long as you get ones that have good securing straps. That would allow you to precisely get 3 times the weight of your camera load—just remember to bring along a few extra small weights if you have a heavier lens you’ll use from time to time. [Note: The 3:1 counterweight-to-load ratio is based on the stock 8′ crane. They have an extender kit that makes the overall length 12′ and would give you somewhere in the range of 18′ of play. If you go that route, your ratio becomes 4:1, so a five pound load requires 20 pounds of counterweight and a 10 pound load requires 40 pounds of counterweight.-JH]
As with all jib arms, you will spend a bit of time familiarizing yourself with its movement to get comfortable with the Orion, but, once you do, you have the capacity to create some really interesting shots without being a professional crane operator.
Depth of Options
Depth of options is a bit of a challenge when it comes to a crane because, on one hand, it’s a one trick pony by its nature, as, for most filmmakers, there are a limited number of applications for crane shots in their films. On the other hand, its sheer ability to change perspectives so rapidly can lend itself to entirely new forms of filmmaking. (For a notable example of this, watch the early Michael Bay film, The Rock, which I swear was shot on cranes almost the entire film!)
With that said, the key components of a jib arm’s repertoire are available with the Orion 210, right out of the box. It has the ability to auto-level—which means that it can keep the camera horizontally level as you raise and lower it—and it also has the ability for you to manually adjust the pitch of the camera, if you want to have it aim downward, and then adjust it up as you lower the arm. (With that said, as with all non-robotic cranes, the latter takes some getting used to and falls under “lots of practice” to get it right.) Unfortunately, the tilt-lock break isn’t included by default, but it is an inexpensive add-on option.
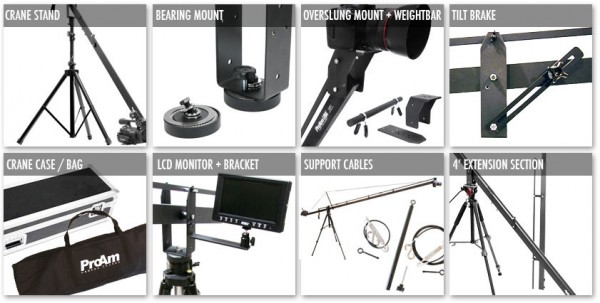
In addition to the out of the box options, you have a number of options you can pay extra for:
-Crane Stand & Mount – $54.99
-7” LCD Monitor kit – $399.99
-LCD Monitor Mounting bracket – $18.99
-360 degree Panning Bearing mount – $59
-Tilt Lock Brake – $17
-4′ extension – $129
-12′ stabilizing support cables (for use with extension) – $39
-Crane Bag – $59

There are a lot of different accessory options, though the Crane Stand and Bag are the most necessary, followed by the bearing mount if you’re wanting to do rotational sweeps.
Performance
All in all, this is a great little system for smaller cameras and seems to hold up pretty well. I found the rubber grip for the manual tilt handle to be comfortably padded and easy to operate. Once you get used to operating the system, you can reliably create and recreate very cool crane movements.
With that said, the tripod system wasn’t quite as secure as I would like, as it pretty much requires a heavy duty tripod with a long mount to fasten securely—which is a little confusing since this system is designed for a lighter camera, I’m not sure why it doesn’t come with a mount for a narrower tripod plate. (Even the midline Manfrotto tripod we tested had too much play because it didn’t have a long plate.) However, we had a chance to check out the Pro Am crane stand and it is much more secure and really locks in with the plate—plus you don’t have to mess around with your actual production tripod. As such, this is one of those accessories you just probably want to go ahead and buy from the beginning.
(Besides the crane stand, the other accessory most will really want to consider getting is the crane bag. While the crane breaks down fairly well, it’s too long to store in almost any other type of bag—even ones for light stands and light kits aren’t long enough.)
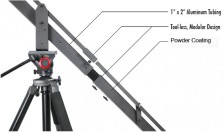
My admittedly minor nitpicks about the construction are that the powder coating started to chip away somewhat easily (both in the weight holding area, because of the tension holders, and in the undercarriage because the tightening screws go straight into the metal—rather than into holes) and that the foam on the tilt handle felt a bit flimsy—like it would start to fall apart after some heavy use. (With that said, I recently discovered a liquid electrical tape that essentially coats whatever it’s painted on in rubber. For a foam rubber grip like this, I could see how it would give a more resistant rubber shell that would give you a better tactile feel and extend the handle’s life. At $7 a bottle, I’m gonna be keeping a couple of these in my grip bag anyway, because you can give grip ties better interior gripping power and apply non-slip surfaces to lots of gear that should’ve already had it.)
Value
At $299 for a jib arm (or $358 for essentially a full crane, with the crane stand), you’re hard pressed to find a better value for small cameras than the Orion 210. This is an impressive setup and, for folks who are DSLR filmmakers, really should be a setup that you’re looking at.
Final Comments
Craig McDaniel pointed out how solid a company ProAm has been in the years he’s used their products in his review of the Taurus Jr. While I’m newer to their products than he, I resoundingly agree that the Orion 210 is an excellent bang for your buck. (Even better if you’re using one of the wireless DSLRs that can feed a video image to your iphone or ipad.)
|
Breakdown
|
|
|
Ease of Use
|
9.4 |
|
Depth of Options
|
9.5 |
|
Performance
|
9.0 |
|
Value vs. Cost
|
10.0 |
|
Overall Score |
9.5 |


